


How to Maintain a Home Salt Wall: Complete Guide
Table of Contents
- Why Regular Maintenance Matters for Your Salt Wall
- How to Clean Salt Bricks Without Damage
- Salt Wall Humidity Control: Preventing Moisture Damage
- Monthly and Seasonal Inspection Routine
- Salt Wall Maintenance Checklist for Year-Round Care
- Troubleshooting Common Salt Wall Problems
- Lighting and Electrical Safety for Salt Walls
- Repair and Replacement of Damaged Bricks
- Frequently Asked Questions
Last Updated: October 12, 2026
Why Regular Maintenance Matters for Your Salt Wall
A home salt wall transforms any space into a calming wellness retreat. But like any premium installation, a salt wall requires consistent care to stay beautiful and functional. Without proper maintenance, your Himalayan pink salt bricks can deteriorate, develop moisture problems, and lose their aesthetic appeal.

Think of salt wall maintenance like caring for any natural material in your home. Wood needs finishing. Stone needs sealing. Salt needs protection from humidity and dust. The good news: learning how to maintain a home salt wall isn't complicated or time-consuming.
At Vital Fit Home, we help customers install premium salt therapy installations and guide them through the long-term care that keeps these wellness spaces performing beautifully. The payoff is years of uninterrupted enjoyment from your investment.
Here's what you need to know about keeping your salt wall in peak condition.
How to Clean Salt Bricks Without Damage
Salt bricks are porous and delicate. Water is their enemy. Harsh chemicals can damage the surface. The right cleaning approach uses minimal moisture and gentle handling.
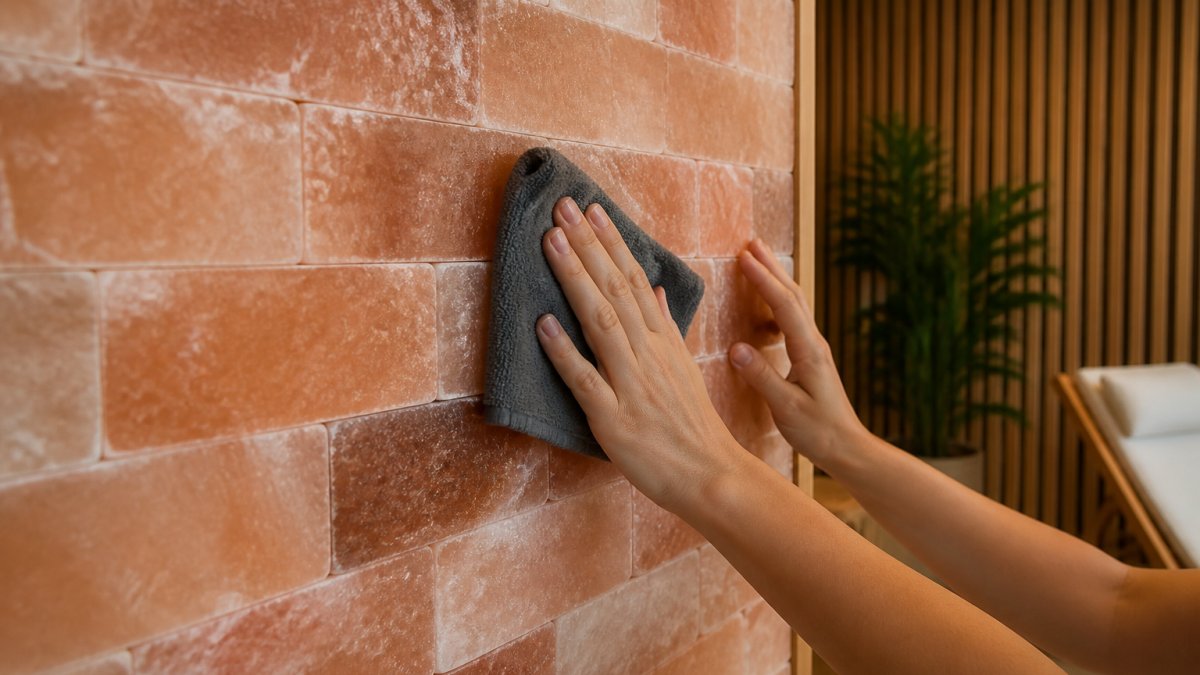
Dry Cleaning Method for Everyday Dust
Dust accumulates on salt surfaces naturally. The dry cleaning method removes it without any water exposure.
Use a soft microfiber cloth or feather duster. Wipe gently across the salt brick surface. Work in one direction to avoid pushing dust into crevices. For textured surfaces, use a soft brush with natural bristles. Avoid stiff-bristled brushes, they can scratch and crack the brick.
Do this weekly or every two weeks, depending on dust levels in your space. It takes three to five minutes for a standard wall section.
Never use compressed air. The force can damage salt bricks and scatter dust into corners where it's harder to remove later.
Wet Cleaning: When and How to Use Water Safely
Sometimes dust settles into texture grooves and dry methods won't fully clean the surface. Wet cleaning works, but it requires caution.
Use distilled water only. Tap water contains minerals that leave residue on salt. Fill a spray bottle with distilled water. Lightly mist one small section at a time, do not soak the bricks.
Immediately wipe the misted area with a clean microfiber cloth. Work quickly to minimize water contact time. The goal is damp, not wet.
This method works best in low-humidity environments. Never use wet cleaning when your room's humidity is already elevated. Wait for drier conditions.
Limit wet cleaning to once per month maximum. Frequent water exposure weakens the salt structure over time.
Products to Avoid
Certain cleaning products damage salt irreversibly. Never use these:
- Vinegar or acidic cleaners, they dissolve salt
- Bleach or ammonia-based products, they stain and weaken the structure
- Oil-based polishes, they trap moisture against the brick
- Abrasive scrubbers or steel wool, they gouge and scratch
- Commercial tile cleaners, most contain chemicals that react with salt minerals
Stick to distilled water and soft cloths. That's genuinely all you need.
Salt Wall Humidity Control: Preventing Moisture Damage
Moisture is the primary threat to salt wall longevity. High humidity causes salt to absorb water, which weakens the structure and can lead to crumbling and efflorescence (white salt deposits on the surface).
Your goal is to keep the room dry and well-ventilated.
Optimal Humidity Levels for Salt Walls
The ideal humidity range for a salt wall is between 30% and 50%. Below 30%, the air becomes uncomfortably dry. Above 50%, moisture begins accumulating on the salt surface.
Monitor humidity with an inexpensive digital hygrometer. Place it near the wall but not directly touching the bricks. Check it daily for the first month after installation. This baseline helps you understand how your room naturally behaves.
If humidity regularly exceeds 50%, you need ventilation or dehumidification. If it stays below 30%, your space is actually ideal for salt walls.
Humidity fluctuates seasonally. Summer typically brings higher humidity. Winter is usually drier. Adjust your moisture control strategy with the seasons.
Ventilation and Air Circulation
Moving air prevents moisture from settling on salt surfaces. Open windows when weather permits. Use ceiling fans to circulate air gently. Avoid pointing fans directly at the wall, this creates uneven drying.
In bathrooms or kitchens with salt walls, run exhaust fans during and for 20 minutes after showers or cooking. These rooms generate moisture spikes that damage salt quickly if not ventilated.
Install a small dehumidifier if your room's humidity stays above 50% despite ventilation. Place it across the room from the wall, not directly in front of it. Run it during high-humidity periods (typically afternoons and evenings).
Air conditioning naturally dehumidifies spaces. If your home has central AC, keeping it running maintains stable humidity levels.
Monthly and Seasonal Inspection Routine
Consistent inspection catches problems early, before they spread. Set a calendar reminder for the first of each month.
During your monthly check:
- Visually scan the entire wall for cracks, crumbling edges, or white deposits
- Feel the wall surface, it should be dry to the touch
- Check for any musty or damp smell near the wall
- Verify that the wall is still firmly attached (gently press a few bricks)
- Look for water stains or discoloration
Seasonal inspections happen four times per year (start of each season). These are more thorough.
Spring: After winter heating and spring moisture, check for any damage from seasonal transitions. Verify that grout or adhesive hasn't separated.
Summer: High humidity is peak season for moisture problems. Check humidity levels daily. Look for any soft spots or areas where salt feels damp.
Fall: Prepare for winter by ensuring ventilation is working properly. Check that no cracks have developed during summer.
Winter: Heating systems dry indoor air. Verify humidity hasn't dropped below 30%, which can cause salt to become brittle.
Document what you find. Take photos of the wall each season. This creates a record that helps you spot gradual changes.
Salt Wall Maintenance Checklist for Year-Round Care
Use this checklist to stay organized. Print it or save it to your phone.
| Task | Frequency | Time Required | Notes |
|---|---|---|---|
| Dry dust with soft cloth | Weekly or bi-weekly | 3-5 minutes | Use microfiber cloth only |
| Check humidity level | Daily (first month), then weekly | 1 minute | Target 30-50% range |
| Visual inspection | Monthly | 10 minutes | Look for cracks, deposits, dampness |
| Wet cleaning (if needed) | Monthly maximum | 10 minutes | Only in low-humidity conditions |
| Seasonal deep inspection | Four times per year | 20 minutes | Document with photos |
| Dehumidifier maintenance | As needed | 5 minutes | Empty water, clean filter |
| Check wall attachment | Quarterly | 5 minutes | Gently press bricks; verify stability |
Print this checklist and keep it near your salt wall. Checking boxes creates accountability and prevents you from forgetting maintenance tasks.
Troubleshooting Common Salt Wall Problems
Most salt wall issues stem from moisture, dust, or structural stress. Here's how to identify and fix common problems.
Himalayan Pink Salt Bricks Kit – 256 Sq Ft Total Coverage | Bulk Wall Tiles →
Salt Deterioration and Crumbling Bricks
Crumbling edges or soft spots mean the salt is breaking down. This happens when moisture penetrates the brick structure.
First, check your humidity. If it's above 50%, that's your culprit. Reduce humidity immediately using the ventilation and dehumidification strategies covered earlier.
Examine the wall's substrate (the wall behind the salt). If it's damp, you have a moisture problem at the foundation. This requires professional assessment, the substrate may need waterproofing before the salt wall can be restored.
For isolated crumbling bricks, replacement is the solution. Contact the manufacturer for matching bricks.
If crumbling is widespread, the entire wall may need replacement. This suggests chronic moisture exposure that can't be easily fixed.
Efflorescence and Salt Deposits
White, powdery deposits on salt surfaces are efflorescence, salt minerals that have crystallized on the brick surface. This happens when moisture moves through the salt and evaporates, leaving minerals behind.
Efflorescence is a sign of moisture movement. It's not damage itself, but it indicates a moisture problem exists.
First, address the humidity issue. Reduce humidity and improve ventilation. Once the moisture problem is fixed, efflorescence often resolves on its own.
For existing deposits, use a soft brush to gently remove them. Do not use water or vinegar. A dry brush works best. If deposits are stubborn, a barely damp cloth works, but dry it immediately.
Prevent future efflorescence by maintaining humidity below 50% and ensuring good air circulation.
Condensation and Damp Walls
If the wall feels wet or you see water droplets on the surface, condensation is forming. This happens when humid air hits the cool salt surface.
Condensation is an emergency. Stop it immediately or the salt will deteriorate rapidly.
Increase ventilation dramatically. Open windows. Run fans. Turn on exhaust fans continuously.
Run a dehumidifier at full power until the wall is completely dry. This may take several hours or days, depending on how wet it is.
Once the wall is dry, maintain humidity below 45% going forward. Condensation indicates your space is too humid for a salt wall in its current condition.
If condensation returns regularly, your room may not be suitable for a salt wall without major ventilation upgrades (like installing a dedicated exhaust system or humidity-controlled ventilation).
Lighting and Electrical Safety for Salt Walls
Salt walls are often backlit or lit with decorative fixtures. Proper lighting enhances the aesthetic while keeping the installation safe.
Salt is slightly conductive due to its mineral content. Never install electrical fixtures directly against the salt surface.
Use LED lighting only. LEDs generate minimal heat, which reduces the risk of moisture problems around fixtures.
Waterproof all electrical connections. Use weatherproof junction boxes and sealed connectors. Even though salt walls are indoors, the moisture environment requires extra protection.
Have an electrician install any hardwired lighting. DIY electrical work around moisture-prone areas is risky.
Inspect lighting fixtures monthly. Look for any corrosion, discoloration, or loose connections. Salt's mineral content can corrode unprotected metal over time.
If you notice any electrical issues, flickering lights, warm fixtures, or burning smells, shut off power immediately and call an electrician. Do not attempt repairs yourself.
Repair and Replacement of Damaged Bricks
Identify the damaged brick. Mark it clearly so you don't accidentally remove the wrong one.
Carefully remove the damaged brick by hand. Gently wiggle and pull, do not use tools that might damage surrounding bricks.
Clean the empty space. Remove any debris, dust, or old adhesive.
Obtain a replacement brick from the original manufacturer. Himalayan salt bricks vary slightly in color and texture, so matching is important.
Install the new brick by hand, pressing it firmly into place.
Allow mortar to cure fully (usually 24-48 hours) before putting any weight or pressure on the wall.
For multiple damaged bricks or structural issues, contact a professional installer. Attempting large repairs yourself risks destabilizing the entire wall.
Understanding how to maintain a home salt wall is straightforward when you know what salt responds to. Dust it regularly.
If you're building a salt wall from scratch, Vital Fit Home offers premium Himalayan salt brick kits in multiple sizes and coverage areas. The Himalayan Pink Salt Bricks Kit - 32 Sq Ft Total Coverage includes 144 natural salt bricks and works perfectly for residential installations.
Frequently Asked Questions
How often should you inspect a home salt wall?
Inspect your salt wall monthly for dust buildup, cracks, or signs of moisture. During humid seasons or after temperature fluctuations, check weekly. Look for efflorescence (white salt deposits), soft spots, or discoloration that may indicate water damage. Early detection prevents costly repairs and extends the life of your salt bricks.
What humidity level is best for a salt wall?
The ideal humidity range for a salt wall is between 30% and 50%. Levels above 50% can lead to moisture accumulation on the salt surface. Use a hygrometer to monitor levels, and adjust ventilation or run a dehumidifier if needed to maintain the ideal range for your installation.
Can you use water to clean salt bricks?
Water can damage salt bricks if used excessively. For light cleaning, use a barely damp microfiber cloth and dry immediately afterward. Never soak or spray salt bricks directly. For stubborn dust, use a soft brush or dry cloth first. Avoid commercial cleaners, acids, or abrasive materials that dissolve or etch the salt surface.
What should you do if salt bricks start to dissolve or crumble?
Dissolving or crumbling indicates excessive moisture exposure. First, reduce humidity by improving ventilation and running a dehumidifier. Inspect the wall substrate for water leaks or condensation sources. If damage is localized, remove the affected brick and replace it. For widespread deterioration, consult a salt wall specialist to assess structural integrity.



Leave a comment
This site is protected by hCaptcha and the hCaptcha Privacy Policy and Terms of Service apply.