

Himalayan Salt Wall Tiles for Home Sauna: 2026 Guide
Table of Contents
- What Himalayan Salt Wall Tiles Bring to a Home Sauna
- Salt Bricks vs. Tiles vs. Prefabricated Panels
- Sizing the Wall: Panel Dimensions, Block Thickness, and Coverage
- Sauna Salt Wall Installation: Step-by-Step
- Himalayan Salt Tiles for Infrared Sauna Builds
- Sauna Salt Wall Lighting: Backlighting and Electrical Safety
- Sauna Salt Wall Lifespan, Cleaning, and Repair
- Cost Breakdown and Product Options
- Frequently Asked Questions
Last Updated: October 20, 2026
What Himalayan Salt Wall Tiles Bring to a Home Sauna
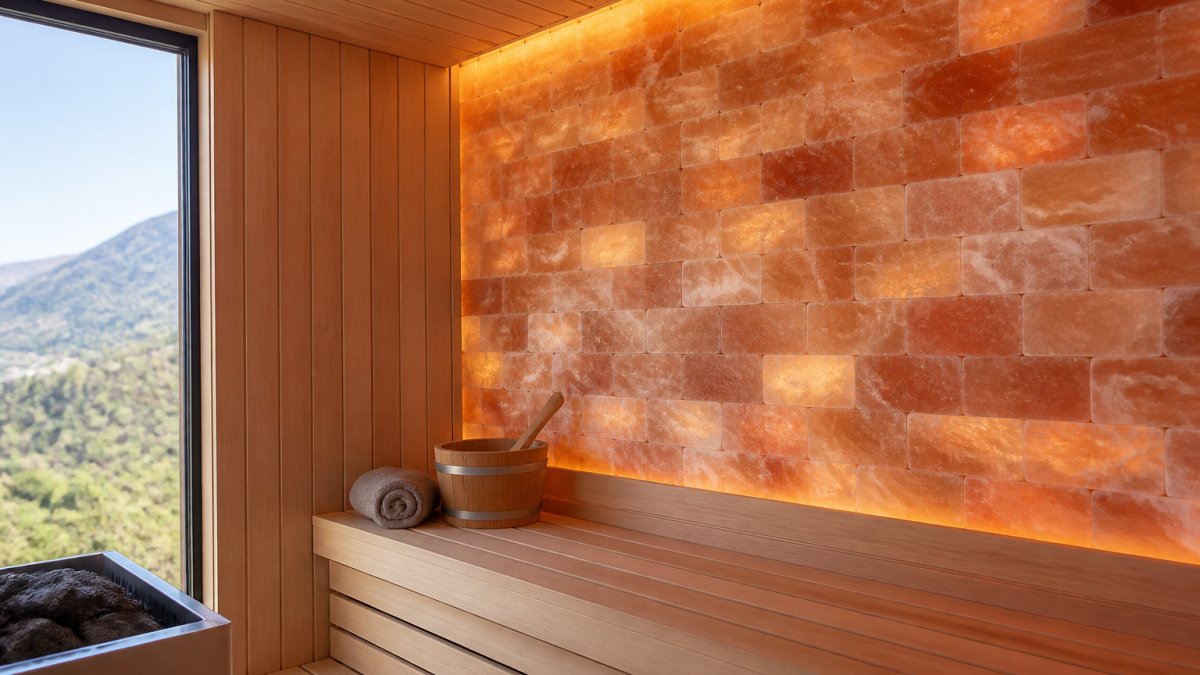
Himalayan salt wall tiles for home sauna projects are hand-cut blocks of natural pink salt that turn an ordinary sauna wall into a warm, glowing feature.

The appeal is partly visual and partly atmospheric: gently heated salt gives off a soft amber glow and a dry, mineral-rich feel that many sauna users find calming.
Below, we cover tile types, sizing, structural prep, lighting safety, and realistic costs so you can plan before you buy a single brick.
Salt Bricks vs. Tiles vs. Prefabricated Panels
Three formats dominate the market, and the right pick depends on how much control you want over the finished wall. Salt bricks are the traditional choice: loose, hand-cut blocks stacked in a running bond or dry-stacked for a rustic look. Salt tiles are thinner and more uniform, easier to align but less dramatic in texture. Prefabricated salt panels arrive as a bonded sheet that mounts as one unit, speeding installation but limiting customization.

- Salt bricks: maximum flexibility, visible depth, heaviest per square foot
- Salt tiles: flatter face, tighter joints, faster to lay
- Prefabricated panels: quickest install, least forgiving of uneven walls
A common mistake is buying panels for a wall that is not flat. Panels amplify every bump. Bricks hide small irregularities because you can shim each course as you stack.
Sizing the Wall: Panel Dimensions, Block Thickness, and Coverage
Start with arithmetic, not aesthetics. Measure the wall height and width in inches, multiply them, and divide by 144 to get square footage. Then divide by the coverage of one kit.
Most Himalayan salt bricks sold for sauna walls run 8 x 4 x 2 inches or 8 x 8 x 2 inches.

| Format | Typical Size | Coverage per Unit | Best For |
|---|---|---|---|
| Small brick | 8 x 4 x 2 in | ~0.22 sq ft | Detailed patterns, curved walls |
| Large brick | 8 x 8 x 2 in | ~0.44 sq ft | Fast coverage, bold texture |
| Prefab panel | Varies by maker | Listed per panel | Flat walls, tight timelines |
Plan the wall height around your bench line. A floor-to-ceiling salt wall looks best, but a 4-foot-tall feature wall behind the bench is easier to support and cheaper to build.
Sauna Salt Wall Installation: Step-by-Step
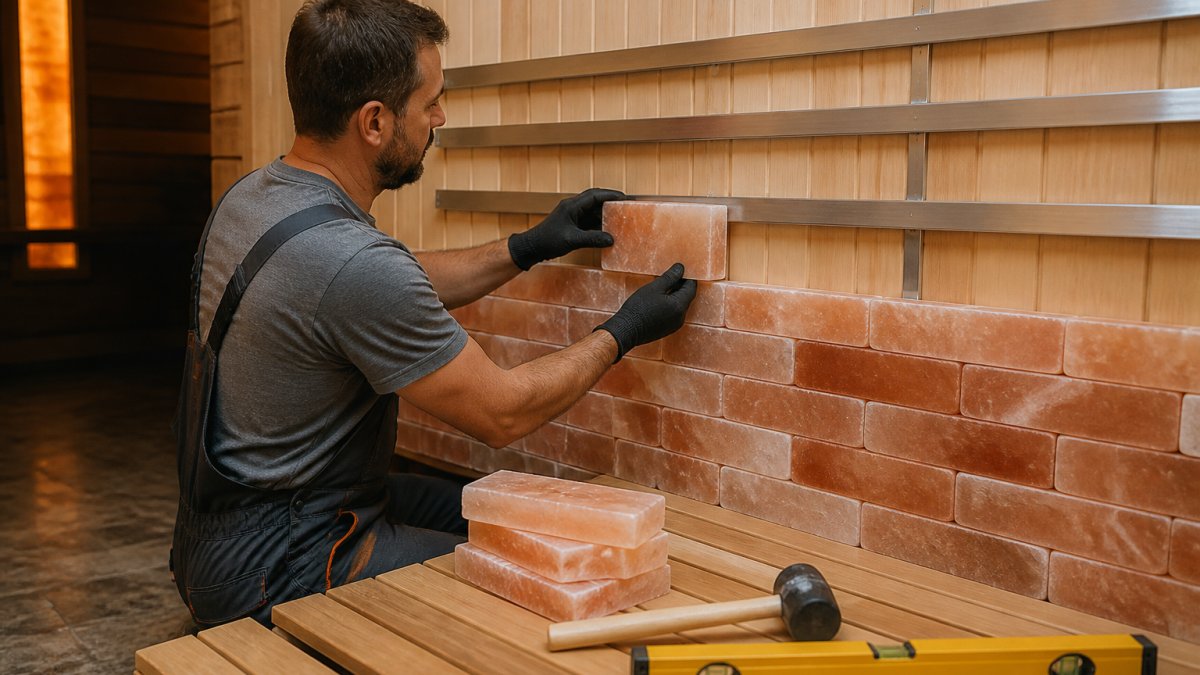
Sauna salt wall installation follows the same logic as any thin-stone veneer: prepare the substrate, anchor a support system, then stack in courses. The difference is that salt is heavy, friable, and moisture-sensitive, so every step needs care, and the structural math needs to happen before you buy a single brick.
Step 1: Calculate the Load Before You Buy
A 2-inch-thick Himalayan salt wall weighs roughly 12 to 14 pounds per square foot, depending on block density and joint fill. A 4-foot by 8-foot feature wall (32 square feet) adds about 384 to 448 pounds to the structure, before mounting channels, screws, or lighting.
Write down your wall's square footage and multiply by 13 to get a working load estimate. If the total exceeds 300 pounds, plan to anchor into wall framing or masonry, not drywall alone.
Step 2: Prepare the Substrate
Cement board, masonry, or a plywood-sheathed stud wall are the right substrates. Greenboard drywall can work for a small accent wall out of the splash zone, but it cannot carry a full-height salt wall alone. Check flatness with a 4-foot level; salt bricks can hide 1/8-inch irregularities, but prefabricated panels cannot.
Step 3: Locate Framing and Plan Anchors
Use a stud finder to mark every stud. For a 32-square-foot wall, plan a stainless-steel mounting channel at the base course and at least one at mid-height. Fasten with corrosion-resistant structural screws penetrating at least 1 inch into framing; for masonry, use load-rated wedge anchors. Never rely on drywall anchors alone, their pull-out strength is far below what a salt wall demands.
Step 4: Install the Base Channel
Snap a level line at the base of the wall. Fasten a stainless-steel U-channel or angle with the screws you selected, stainless matters in a sauna, since galvanized steel can corrode in the humidity. Check level every 12 inches as you fasten.
Step 5: Dry-Fit and Stack the First Course
Set the first course of bricks into the channel without adhesive. Check level every three or four bricks and adjust with shims. Offset joints by half a brick on the second course for a running bond. Tap each brick gently with a rubber mallet, never force one, which can crack it.
Step 6: Stack, Shim, and Check Plumb
Work in courses, checking plumb at each end every two courses. Salt bricks vary slightly in dimension, so expect to shim. Keep joints at about 1/8 inch. If a brick rocks, pull and reset it rather than forcing the next course over it.
Step 7: Fill Joints and Clean Up
Work fine-grade salt into the gaps with a small brush or your fingers, then vacuum the face with a brush attachment. Do not use mortar or grout, salt joints are dry-filled so the wall can move slightly with temperature swings.
Step 8: Final Safety Checks
Before you call the wall done, verify: every channel is anchored into framing or masonry; no brick rocks when pressed; the wall is plumb within 1/4 inch over its height; and the salt face is at least 3 feet from the heater and the water bucket. If any check fails, fix it before the first sauna session.
Himalayan Pink Salt Bricks Kit – 32 Sq Ft Total Coverage | Includes (144) →
Expected result: a level, plumb, tightly stacked wall with consistent 1/8-inch joints, anchored into framing, and no rocking bricks.
Himalayan Salt Tiles for Infrared Sauna Builds
Himalayan salt tiles for infrared sauna cabins work differently than in a traditional hot-rock sauna. Infrared cabins run drier and at lower air temperatures, which is gentler on salt, but heaters emit directly, so keep salt out of the heater's line of sight.
In practice, an infrared build is the easier host for a salt wall. Plan the feature on a side wall or behind the bench, never in front of a panel heater.
Sauna Salt Wall Lighting: Backlighting and Electrical Safety
Sauna salt wall lighting is where most DIY builds go wrong. Backlighting makes salt glow, but a sauna is a wet, hot environment, and standard LED strips are not rated for it. The National Electrical Code (NEC) classifies saunas and steam rooms as wet locations, which triggers specific requirements for fixtures, wiring methods, and ground-fault protection.
What the Code Requires
In a wet location, luminaires must be listed and marked for the environment; standard dry-location LED strips and puck lights do not qualify.
A licensed electrician should handle any line-voltage work and confirm the circuit is GFCI-protected. Low-voltage LED systems are easier to place, but the transformer still needs to sit in a cool, dry spot outside the hot zone.
Low-Voltage vs. Line-Voltage
Low-voltage LED systems (typically 12V or 24V) are the practical choice for salt wall backlighting: lower shock risk, and small fixtures fit behind salt courses. The trade-off is the driver, which must sit outside the cabin in a dry, ventilated space because heat degrades drivers quickly. Run low-voltage cable through conduit or wet-rated sleeving, and seal every wall penetration with silicone.
Line-voltage fixtures are possible but require wet-location listing, GFCI protection, and an electrician. For most homeowners, low-voltage is simpler and safer.
Placement and Heat Clearance
Keep LED fixtures at least 6 inches from the sauna heater and out of the direct radiant path. Heat shortens LED lifespan, most strip lights lose half their output after a few years in a hot environment, and drivers fail sooner. Mount strips behind a lip or in a channel so the light washes the salt rather than showing the source, which also hides the fixture and reduces glare.
Wiring Checklist
- Use wet- or damp-rated LED strips or pucks with a UL listing
- Keep drivers and transformers outside the cabin in a dry, cool location
- Run low-voltage cable in conduit or wet-rated sleeving
- Seal every wall penetration with silicone
- Protect line-voltage circuits with GFCI
- Test the circuit and GFCI before closing up the wall
- Have a licensed electrician inspect any line-voltage work
Sauna Salt Wall Lifespan, Cleaning, and Repair
A well-built salt wall lasts for years, but it is not maintenance-free. Sauna salt wall lifespan depends mostly on moisture control: keep the room ventilated, avoid direct water contact, and the wall holds its shape and color.
Cleaning is simple: vacuum dust with a brush attachment and wipe light marks with a barely damp cloth. Never scrub with water or harsh cleaners, which dissolve the surface. If a brick chips or cracks, knock out the damaged piece and set a replacement with matching joint fill.
Cost Breakdown and Product Options
Budget the project in three parts: salt, support hardware, and labor. Salt is the biggest line item, and kit pricing scales with coverage.
| Kit | Coverage | Price | Best For |
|---|---|---|---|
| 16 Sq Ft Kit (4x8 or 8x8) | ~16 sq ft | $1,160.00 | Accent walls, small saunas |
| 16 Sq Ft Kit with bonus salt | ~16 sq ft | $1,500.00 | DIY builds needing joint fill |
| 32 Sq Ft Kit (144 bricks) | ~32 sq ft | $1,296.00 | Full feature walls |
| 35 Sq Ft Wall System | ~35 sq ft | $1,990.00 | Complete room builds |
Add stainless channel, fasteners, and lighting to the total, plus electrician time if you are adding backlighting.
Building a salt wall is a construction project, not a decor swap. The homeowners who love their result planned the substrate, the load, and the lighting before ordering bricks.
Frequently Asked Questions
Can you use Himalayan salt tiles in a home sauna?
Yes. Salt wall tiles are cut from natural pink Himalayan salt and are designed for indoor sauna walls, salt rooms, and spa interiors. They work in both traditional and infrared saunas as long as the wall behind them is properly prepared and the room is ventilated. Keep in mind that salt is heavy and moisture-sensitive, so plan for structural support and avoid direct water spray. Many homeowners use salt tiles as a feature wall rather than covering the entire sauna.
How do you install Himalayan salt wall tiles in a sauna?
Start by checking that the wall can carry the weight, then mount stainless-steel channels or a backing board. Lay out the tiles dry to plan cuts and color variation, then set them by dry-stacking them in the channel system. Leave small gaps for expansion, check each course with a level, and finish the seams with fine-grade salt. Have a licensed electrician handle any lighting or wiring before the tiles go up.
How long does a salt wall last in a sauna?
A well-built indoor salt wall typically lasts many years, but lifespan depends on moisture control. Salt slowly dissolves when exposed to standing water or high humidity, so ventilation and a drain-friendly design matter more than the salt itself. Expect some surface erosion and color shifts over time, which many owners treat as part of the look. Repairing a salt wall usually means replacing individual bricks rather than rebuilding the whole feature.
Do Himalayan salt tiles need special lighting?
Salt walls look best with warm LED backlighting, which brings out the pink and amber tones and the translucent surface. Use LED fixtures rated for damp locations and keep the driver and wiring outside the salt zone. All electrical work should meet local code and be done by a licensed electrician. Avoid heat-producing bulbs close to the salt, since uneven heat can crack tiles and shorten the wall's lifespan.



Leave a comment
This site is protected by hCaptcha and the hCaptcha Privacy Policy and Terms of Service apply.